
Anyways, anybody working on a map pack should hold off a few days as I'll be writing a tutorial tonight and uploading it tomorrow. Those who have made a few maps and understand how reqs and luas work will actually find it surprisingly simple. I'll also be uploading a 'dummy' project folder (The BF1 pack's project, but without any mshs, odfs, etc... just the folders) so you can see how things lay out.
Anyways, I haven't tested to see if this will actually help us break the 56 map limit since I only had about 40 maps including the pack. But if nothing else having everything in one folder makes map packs very easy to enable and disable.
-T
Addon tutorial
Creating a 1-addon folder project:
Here's a relatively simple way to put all of the maps you've released into a 1-addon folder map pack. There's a couple of benefits to doing so:
1-It's really easy for a user to enable/disable your map (in case they have 56 maps, which is the limit)
2-You save yourself a little bit of space. If you use the same sides on multiple maps then you don't have lots of copies of the files. Same deal with core.lvl and mission.lvl. Only one needed.
3-Once your worlds and sides are completed then lua and localization changes can be done globally.
YOU NEED THE FOLLOWING PROGRAM, AVAILABLE FROM http://www.scintilla.org
SCiTE --it's THE BEST lua program since things are color coded.
So here's how (this is assuming all of the maps in your pack are completed). In this example I'll be putting in the two Bespin maps:
1-Create a new project. Name it whatever you want. For the Conversion Pack, the three letter ID is BF1. (From here on out replace BF1 with your project's name). Only leave 'conquest' selected. It makes things easier on you.
2-Once your project is ready, browse to data_BF1/Worlds/BF1. Delete everything in this folder. This way it doesn't actually munge a world, making things faster.
3-First things first, open the addme.lua in data_BF1/Worlds/BF1. Highlight what is shown in this image:
Hidden/Spoiler:
4-Next, open your first map's addme.lua, highlight the same thing, copy and paste over the stuff in the other lua.
5-Close the lua for your first MAP, but leave the PROJECT (map pack) lua open.
6-Open your second map's addme.lua, copy the same stuff you did the first time. DO NOT PASTE YET.
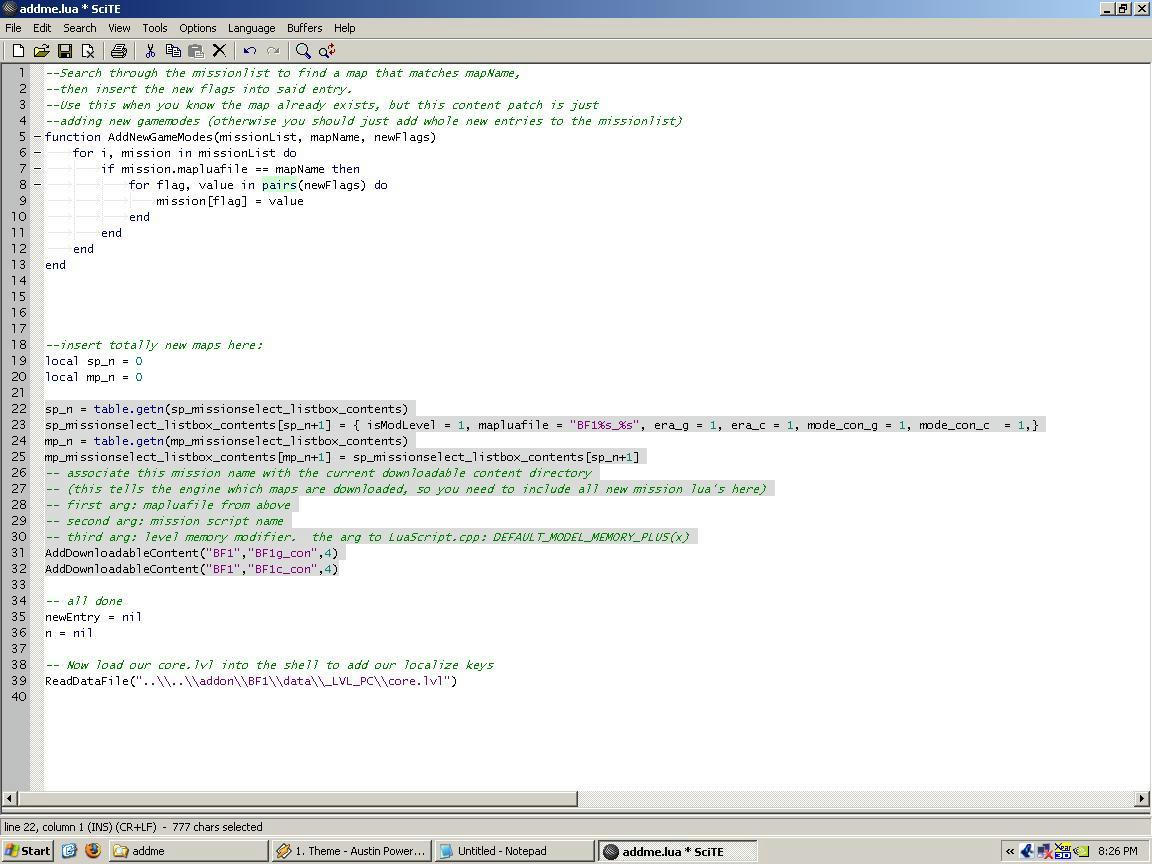
7-Go back to your PROJECT lua and highlight what is show in this image:
Hidden/Spoiler:
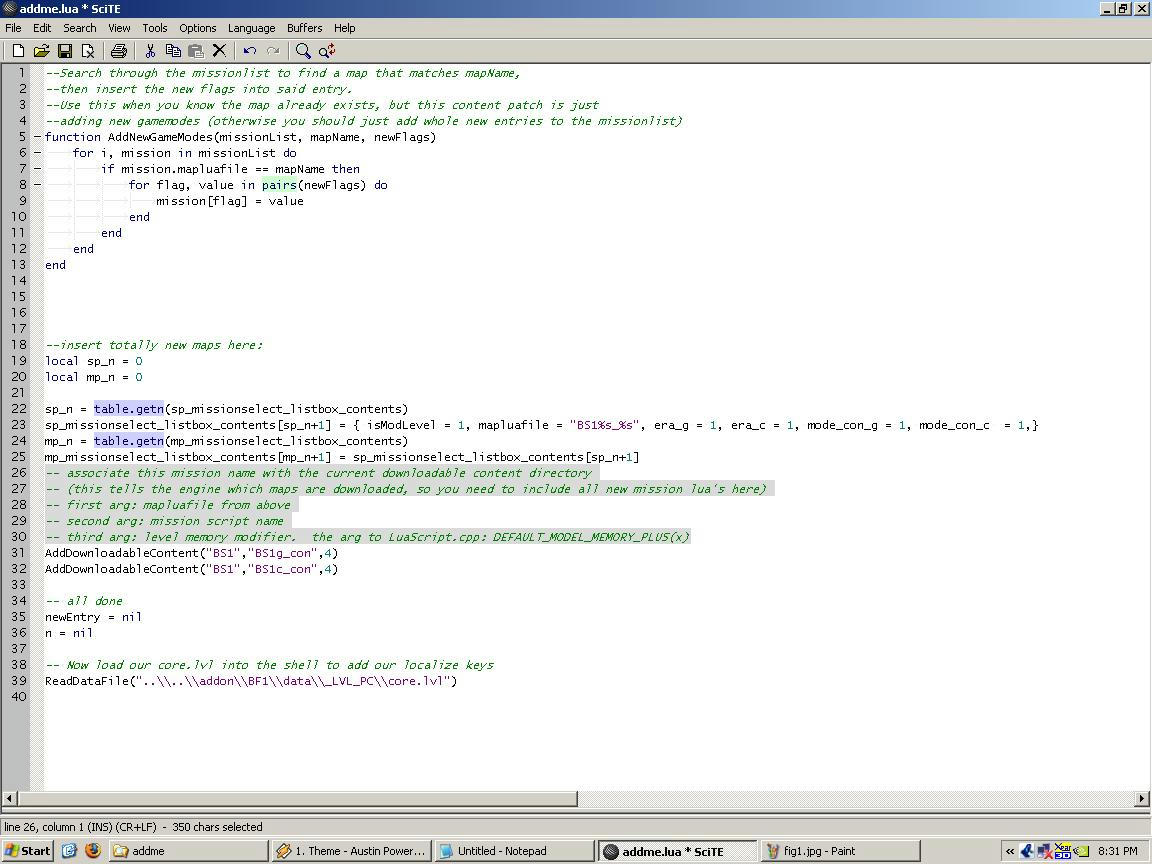
8-Paste the stuff from your second map's lua. It should look like this image:
Hidden/Spoiler:
****Repeat steps 6-8 as many times as needed for additional maps
9-When you're done, close all luas, but save your PROJECT lua.
10-Open your PROJECT's mission.req, found in data_BF1/Common. Highlight what's in this image:
Hidden/Spoiler:
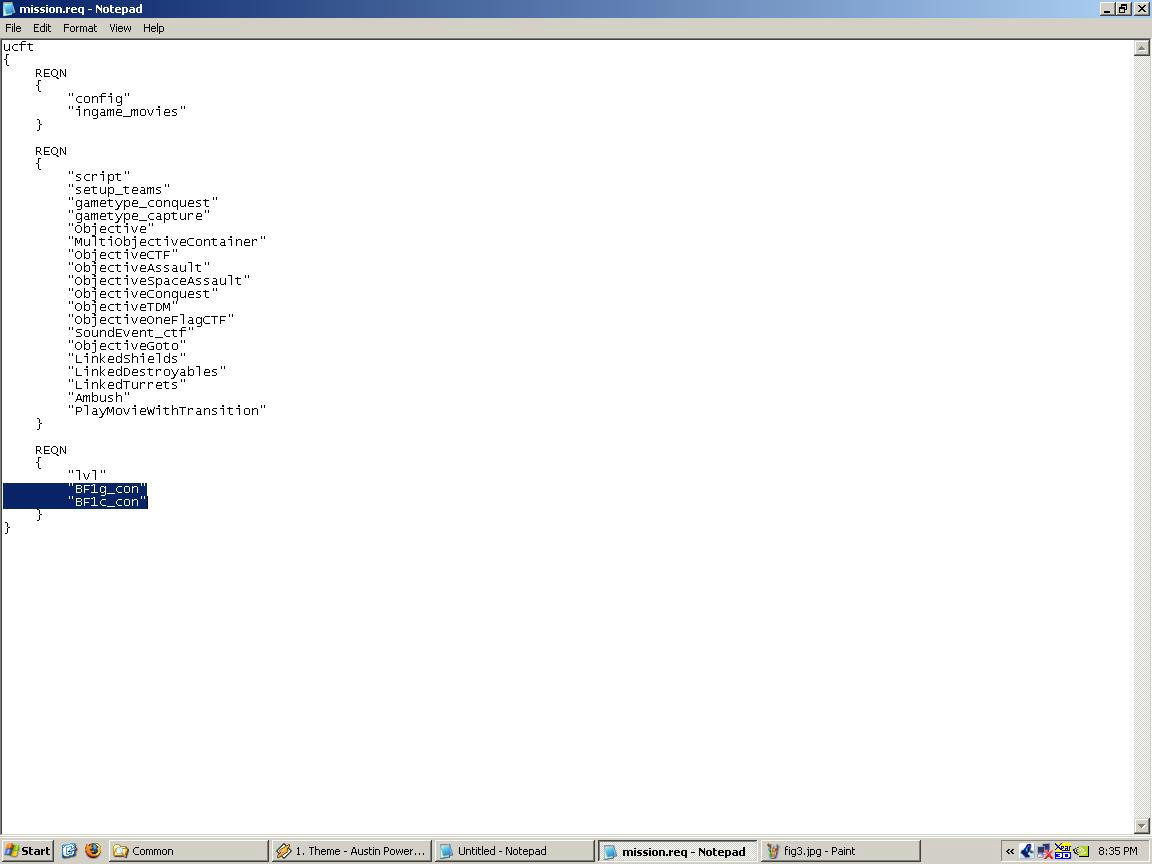
11-Open up your first map's mission.req. Highlight the same section, replace what you highlighted in your PROJECT mission.req.
12-Open your second map's mission.req, Highlight that same section, but this time paste it just below the first map's stuff, like in this image:
Hidden/Spoiler:

****Repeat step 12 as many times as needed for additional maps
13-Close all mission.reqs, make sure you save your PROJECT mission.req
14-Browse to data_BF1/Common/Mission. DELETE EVERY req file in there, you don't need them
15-Browse to your first map's mission folder, copy all the req files over to your PROJECT mission folder.
****Repeat step 15 as many times as needed for additional maps
16-Open data_BF1/Common/Scripts, delete the BF1 folder.
17-Open your first maps /common/scripts folder, copy that three letter folder into your PROJECT scripts folder.
18-Run editlocalize and add the maps localization as needed.
19-Munge your project, making sure you have BF1 as the world selected, common and localize checked.
20-Open /Addon/FIRST MAP/_LVL_PC. Copy JUST THE FOLDERS into /Addon/BF1/_LVL_PC.
****Repeat as needed for other maps.
YAY!!!! WE'RE DONE!